| Back to Table of Contents |
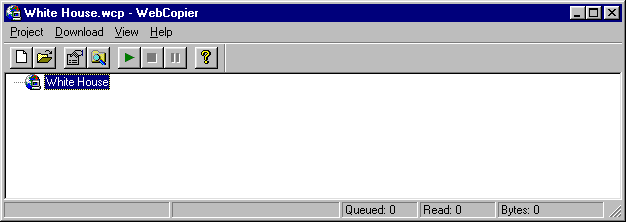
WebCopier has a simple user interface which allows you to select the program features using familiar controls. There are five components in the user interface, namely, Title Bar, Menu Bar, Toolbar, Results Window, and Status Bar. These components are described in the following sections.

Title Bar displays the project name next to the WebCopier name. When no project is opened, it displays "(No Project)" in the place of the project name. The standard Windows System menu is also part of the Title Bar. You can access the System menu by left-clicking the WebCopier icon at the far left, right-clicking anywhere on the bar, or left-clicking on the buttons on the far right. When WebCopier is downloading web pages, the Close command in the System menu is disabled. You must stop downloading before you can exit from WebCopier.
![]()
Menu Bar consists of four drop-down menus: Project, Download, View, and Help. Each menu contains a set of commands which are logically related. These menus and commands in them are detailed in the following subsections.
![]()
The Project menu contains commands to manage projects. There are 7 commands in the Project menu: New, Open, Properties, Rename, Delete, Browse Directory, and Exit.
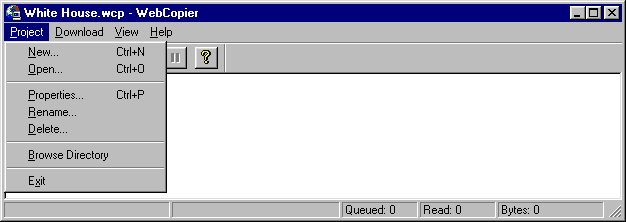
New command invokes the New Project Wizard to create new projects. There are three steps in the New Project Wizard: Website Information, File Types, and Retrieval Options.
Step 1: Website Information
In this step you enter the Project Name, Starting Webpage, and User Authentication information.
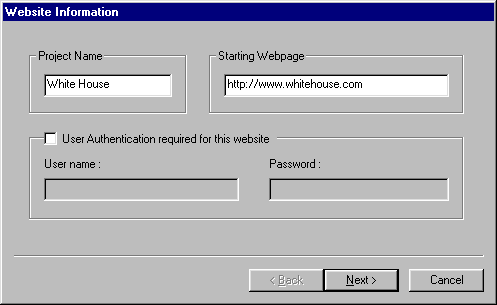
The Project Name is used to identify the project, to form the project file name, and as a directory name to save all downloaded webpages and files. In the following example, since the Project Name is "White House", WebCopier will display "White House" as the root node in the Results Window. The project file "White House.wcp" and a directory called "White House" will be created in the "Projects" directory under the directory where WebCopier is installed.
The Starting Webpage specifies the first webpage you want to retrieve. All other webpages and files are hyperlinked from this page or subsequent pages.
If the website you want to retrieve requires User Authentication you need to check the "User Authentication required for this website" box and enter the "User name" and "Password" in the corresponding boxes. Click on the Next button when you have done entering information for this step. If you decide to canel the creation of a new project, click on the Cancel button.
Step 2: File Types
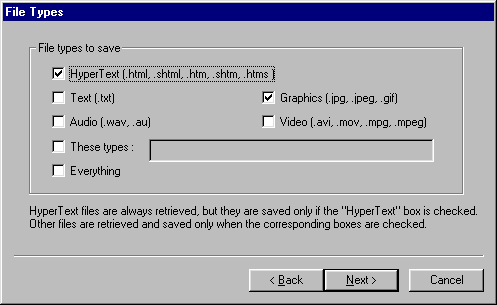
You may specify which types of files to retrieve and save to disk. Hypertext files are always retrieved for parsing. They are saved to disk only when the Hypertext box is checked. Other types of files are retrieved and saved when the corresponding boxes are checked. You may also specify your own file types. To do so just check "These types" box and enter the file types, such as ".exe, .doc, .java", in the following box. If you want to retrieve and save all types of files, just check the "Everything" box. Click on the Next button when done with this step. If you need to change something in the first step, click on the Back button.
There are 7 retrieval options that you may specify. If you want to browse downloaded webpages you should check the "Localize links for retrieved web pages" box. When this box is checked, WebCopier will modify all hyperlinks to point to files on your hard disk. If the "Generate log information" WebCopier will write a log entry for every page and file retrieved to show if the page or file is downloaded successfully or not. "Minimum file size" and "Maximum file size" restrict the size of files to retrieve.
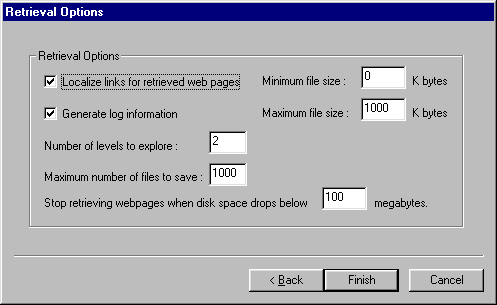
WebCopier consider the starting webpage is at level 1. Web pages hyperlinked from the starting page are at level 2, Subsequent hyperlinked pages are at level 3, 4, ..., etc. WebCopier will retrieve and parse the web pages up to the level you speciy in the "Number of levels to expolre". The following two options are self-explained. When the number of files saved reached the number you specify in the "Maximum number of files to save" WebCopier will stop retrieving web pages and start localizing pages if the "Localize links for retrieved web pages" box is checked. Same thing will happen when disk space has droped below the value specifies in the "Stop retrieving webpages when disk space drops below" box. When you click the Finish button, WebCopier creates a project file and a directory for this new project. The project file name is the "Project name" you entered in Step 1 and the extension of the file is ".wcp". The newly created directory is used for housing downloaded webpages and files for this project.
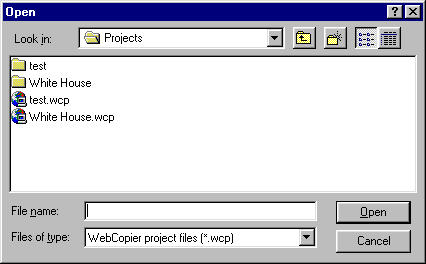
Open command displays the Open dialog box, as shown below, for you to select an existing project to open. Select the project file you want to open and click on the Open button to open the project. You may also doubly-clcik on the project file name to open the project. For example, select "test.wcp" and click on the Open button to open the test project. Doubly-click on "White House.wcp" to open the "White House" project.
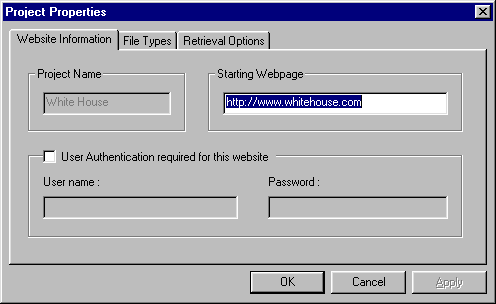
Properties command displays the active project's property sheet for you to view and change properties of the project. This property sheet is the same as the one in New command. You may click on the tabs to view properties on that dialog box. The only property that you can not change in this property sheet is the "Project Name". Use the Rename command to change the project name. When you click on OK or Apply button, project properties are saved in the project file. These new properties will be used next time you download web pages and files fr this project.
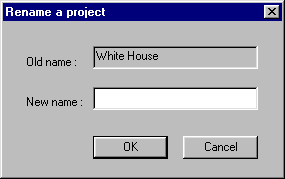
Rename command allows you to change the name of the project. Both the project file and project directory are changed to the new name.
Delete command remove the project file, project directory, and everything in the directory from the disk. It will ask you to comfirm the operation.

Browse Directory command displays the project directory in a Window Expolrer window as shown below.
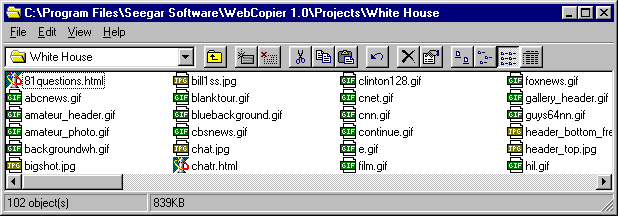
Exit command terminates WebCopier. You may also use the Close command on the application Control Menu. The following shortcuts are also available for Exit command:
Mouse: Double-click the application's Control menu button.
Keys: ALT+F4
Download menu contains 4 commands. The Start, Stop, and Pause commands are used to start, stop, and pause downloading webpages.The Internet Options command invokes the Internet applet of the Control Panel for you to set up Internet connection options and proxy server configuration.

Start command is used to start retrieving webpages and files. After a new project is created or an existing project is opened the Start command is enabled. Select the Start command when you are ready to start downloading webpages and files.
Stop command is used to stop retrieving webpages and files. This command is disabled when a new project is created or an existing project is opened. It is enabled after the Start command has been selected.
Pause command temporarily suspends the retrieval of webpages and files. It is a toggle switch, namely, when it is first selected it pauses the operation and when it is selected again it resumes the operation.
Internet Options command invokes the Internet applet of the Control Panel so that you can set up Internet connection options and proxy server configuration. It displays the Internet Propertities sheet. There are 6 dialog pages in this property sheet. The one that concerns us is the Connection dialog page.
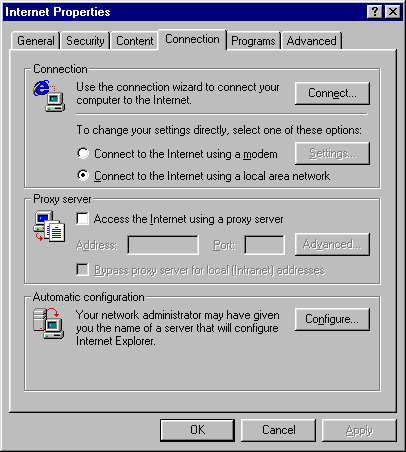
To set up an Internet connection
To configure your computer to use a proxy server for Internet access
Notes
To automatically configure WebCopier on a corporate system
Note
View menu conatins Toolbar and Status Bar commands for you to display or hide the toolbar and status bar.

Help menu conatins Help Topics, Release Notes, WebCopier Homepage, and About WebCopier commands which give you quick access to helpful information of WebCopier.

Help Topics commands displays the Online Help in your default web browser. The Online Help is written in HTML format. You may access the most up-to-date Online Help from WebCopier Homepage. The Release Notes command displays the Release Notes which contains information specific to the version of WebCopier running on your computer. It is recommended that you read through the Release Notes before using WebCopier. The WebCopier Homepage command directs you to WebCopier's homepage. The About WebCopier command displays version number and copyright information of WebCopier.
There are eight push buttons in the Toolbar. These buttons provide quick access to frequently used commands.
The Results Window shows retrieved web pages and files, and the relationship among these web pages and files.

Each webpage is shown as a folder. Links from a webpage are showns as subfolders and files of that folder. To display a webpage just doubly-click the entry to launch the default browser. Multimedia files can also be shown the same way. If you have checked the "Localize links for retrieved web pages" box in Step 3: Retrieval Options of the New Project Wizard you may doubly-click on the Starting Webpage and browse other webpages and files directly from your web browser.
The Status Bar contains five fields to display the current status of WebCopier. The first field displays a brief description of a command when it is selected. The second field shows the URL of thewebpage or file that is currently being downloaded. After all webpages and files are retrieved, this field displays "Project done". If a project is stopped, it shows "Project stopped". The third field shows the number of webpages and files that are in the queue waiting to be retrieved. The fourth field shows the number of webpages and files that have been downloaded. The last field showns the number of bytes downloaded so far.
![]()
| Back to Table of Contents |